


The ability to remotely connect to a different computer is not
something that one needs every day but, when that need does arise, it is
usually for something important. It could be to facilitate remote
assistance from a friend or technically superior person for addressing a
problem you are facing. It could also be needed when you want to share
something on your screen
that needs to be shown to other person in real-time. Maybe you want to
connect to your own computer at home from a different location.
TeamViewer provides an excellent solution to establishing remote connection between two computers and has more features than you might expect. Lets see how it works.
In order to get started you will need to follow this download link and obtain a version for Windows, Linux, Mac or mobile. On executing the download file you will have the choice to install the application or do a one-time run.

For an installed version you might choose to use the software for a personal or professional purpose. It lets you perform two major tasks- establish a remote connection or set up a meeting.

The requestor must enter the partner’s ID and hit the button Connect to Partner. Following to this you will need to authenticate the session by entering the password.

This lets you share your computer screen and have some fun, or request help from a friend. If you want your partner to interact and access an application you will need to activate it by looking for a both-sided arrow on the title bar.

If you choose your connection to be File Transfer type, you will be allowed to send and receive files. Select the files to be transferred and destination on the other end. Hit the Send or Receive button as needed.


Such an ID is generated on starting a meeting from scratch. And there is no restriction on the number of people that can join. The meeting interface gives you all the privileges to share files, start a conference call and make a VOIP or video call.

You may also maintain a list of meetings by using the scheduling meetings link on the interface. It becomes a part of your profile.

Before this you will need to choose a password for such a connection. Following that you will be able to access your machine remotely by logging into your account.

Provisions are available to use the Team Viewer application or the web service (navigate to the website) for such an approach.
TeamViewer provides an excellent solution to establishing remote connection between two computers and has more features than you might expect. Lets see how it works.
In order to get started you will need to follow this download link and obtain a version for Windows, Linux, Mac or mobile. On executing the download file you will have the choice to install the application or do a one-time run.

For an installed version you might choose to use the software for a personal or professional purpose. It lets you perform two major tasks- establish a remote connection or set up a meeting.
Establishing a Remote Connection
When you launch the application you will land on its Remote Control interface. Now, you may either share your ID and Password with a friend to share your machine or acquire one from your friend to access his/her computer.
The requestor must enter the partner’s ID and hit the button Connect to Partner. Following to this you will need to authenticate the session by entering the password.

This lets you share your computer screen and have some fun, or request help from a friend. If you want your partner to interact and access an application you will need to activate it by looking for a both-sided arrow on the title bar.

If you choose your connection to be File Transfer type, you will be allowed to send and receive files. Select the files to be transferred and destination on the other end. Hit the Send or Receive button as needed.
Setting up a Meeting
On the meeting end you might want to start a new session or join an existing one. As you may have noticed you will require your friend’s Meeting ID to join an ongoing session.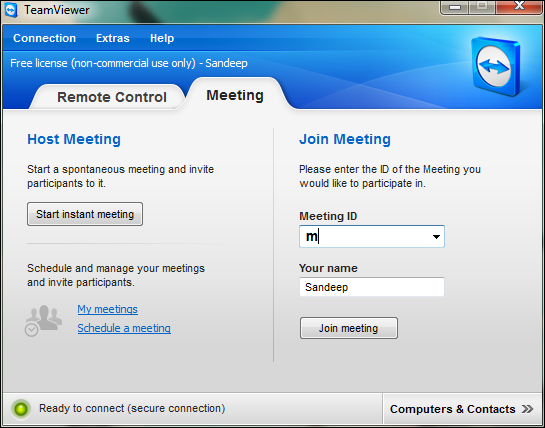
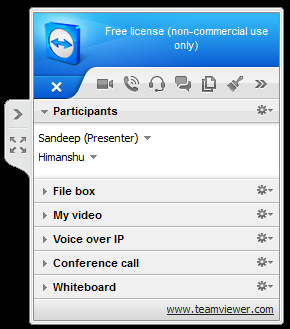
Such an ID is generated on starting a meeting from scratch. And there is no restriction on the number of people that can join. The meeting interface gives you all the privileges to share files, start a conference call and make a VOIP or video call.
You may also maintain a list of meetings by using the scheduling meetings link on the interface. It becomes a part of your profile.
Creating an Unattended Access
This feature allows you to create standalone session for you to be able to access it anywhere. It is associated to the Connection tab and requires you to register and create a user profile.
Before this you will need to choose a password for such a connection. Following that you will be able to access your machine remotely by logging into your account.

Provisions are available to use the Team Viewer application or the web service (navigate to the website) for such an approach.


.jpg)


Every weekend i used to pay a quick visit this website, for the
ReplyDeletereason that i wish for enjoyment, since this this web page conations really good funny stuff too.
Feel free to surf to my web page :: http://ipadvideolessonblog.com